4-Ingredient Cheese Winston DipChocolate Crunch Bars from Scratch
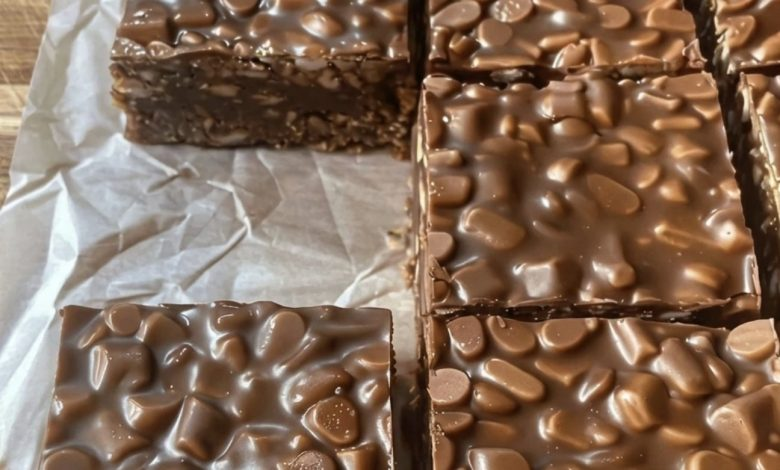
Easy Homemade Chocolate Crunch Bars – No-Bake & Delicious
Craving a chocolate treat with the perfect crispy crunch? These Homemade Chocolate Crunch Bars are an easy, delicious alternative to traditional store-bought candy bars. Made with rich chocolate, creamy peanut butter, natural maple syrup, and crispy rice cereal, they deliver an irresistible combination of smooth, fudgy chocolate and light, crunchy texture.
The best part? There’s no oven required! Simply melt the ingredients together, mix in the cereal, press everything into a pan, and let the refrigerator do the rest.
These homemade bars are perfect for satisfying chocolate cravings, preparing quick snacks, or making a batch of sweet treats to enjoy throughout the week.
❤️ Why You’ll Love These Homemade Crunch Bars
- 🍫 Rich chocolate flavor with a satisfying crispy texture.
- 🥜 Made with simple pantry ingredients.
- ⏱️ Quick preparation with no baking required.
- 💛 Naturally sweetened with maple syrup.
- 🌱 Easy to adapt using different nut or seed butters.
- ❄️ Perfect for making ahead and keeping refrigerated.
📝 Ingredients
The Crunch
| Ingredient | Amount |
|---|---|
| Crispy rice cereal | 3 cups |
The Chocolate Fudge Mixture
| Ingredient | Amount |
|---|---|
| Chocolate chips | 1½ cups |
| Peanut butter or nut/seed butter | 1 cup |
| Maple syrup | ½ cup |
| Coconut oil or grass-fed butter | ¼ cup |
👩🍳 How to Make Homemade Crunch Bars
1. Prepare Your Baking Pan
Line an 8 × 8-inch square baking dish with parchment paper. Leave a little extra parchment hanging over the edges so you can easily lift the finished bars out later.
2. Measure the Crispy Rice Cereal
Pour the crispy rice cereal into a large mixing bowl. Set aside while you prepare the chocolate mixture.
3. Melt the Chocolate Mixture
In a microwave-safe bowl or small saucepan, combine the chocolate chips, peanut butter, maple syrup, and coconut oil.
If using a microwave, heat in short intervals, stirring between each one until everything melts completely. Alternatively, warm the ingredients over low heat on the stovetop.
Stir until the mixture becomes smooth, creamy, and glossy.
4. Combine the Chocolate and Cereal
Pour the melted chocolate mixture over the crispy rice cereal.
Using a spatula, gently fold everything together until the cereal is thoroughly coated. Try to keep the cereal pieces intact so your finished bars have plenty of crunch.
5. Press Into the Pan and Chill
Transfer the chocolate-coated cereal into your prepared baking dish.
Spread it evenly, then press down firmly using the back of a spoon or a piece of parchment paper. Make sure the mixture is compact so the bars hold together when sliced.
Place the pan in the refrigerator for at least 1 hour, or until the chocolate mixture is completely firm.
6. Slice and Serve
Once set, lift the mixture out of the pan using the parchment paper.
Place it on a cutting board and slice into squares or rectangular bars using a sharp knife.
Enjoy immediately or return the bars to the refrigerator for storage.
💡 Helpful Tips for Perfect Crunch Bars
- Choose good-quality chocolate: It makes a noticeable difference in the flavor and texture.
- Melt gently: Avoid overheating the chocolate mixture, as it can become thick or grainy.
- Use fresh crispy rice cereal: Fresh cereal gives the bars their signature crunch.
- Mix carefully: Fold rather than crush the cereal when combining the ingredients.
- Press firmly: Compacting the mixture helps prevent the bars from crumbling.
- Chill completely: Allow enough refrigeration time before cutting for neat, firm bars.
🍫 Fun Ways to Customize Your Crunch Bars
Want to give your homemade treats a little something extra? Try these delicious variations:
- Extra chocolate: Drizzle melted dark or white chocolate over the finished bars.
- Salty and sweet: Sprinkle a little flaky sea salt on top before chilling.
- Nutty crunch: Add chopped almonds, peanuts, or cashews.
- Coconut twist: Mix in a handful of unsweetened shredded coconut.
- Seed butter version: Replace peanut butter with sunflower seed butter for a nut-free alternative, checking that all other ingredients are suitable for your needs.
🧊 Storage Instructions
Refrigerator: Store the bars in an airtight container in the refrigerator for up to 2 weeks. Keep them chilled to maintain their firm texture.
Freezer: Place the bars in a freezer-safe container with parchment paper between layers. Freeze for up to 2–3 months.
Serving: Let frozen bars sit at room temperature for a few minutes before enjoying. They are delicious straight from the refrigerator, too!
❤️ Final Thoughts
These Homemade Chocolate Crunch Bars are everything a chocolate lover could want: rich, creamy, crispy, and wonderfully satisfying. With just a handful of everyday ingredients and absolutely no baking, they’re an easy homemade treat you’ll want to make again and again.
Prepare a batch for afternoon snacking, lunchbox treats, or a quick chocolate dessert. Once you taste that combination of smooth peanut butter chocolate and crispy rice cereal, you may never want to buy packaged crunch bars again!